
In This Article
Introduction: Your Sunday Prep Has an Expiration Date
It’s Thursday. You open the fridge, and there it is — the fourth of five identical chicken-and-rice containers you cooked on Sunday, looking back at you like a question you don’t want to answer. Is it still good? Should you eat it, freeze it, or pitch it?
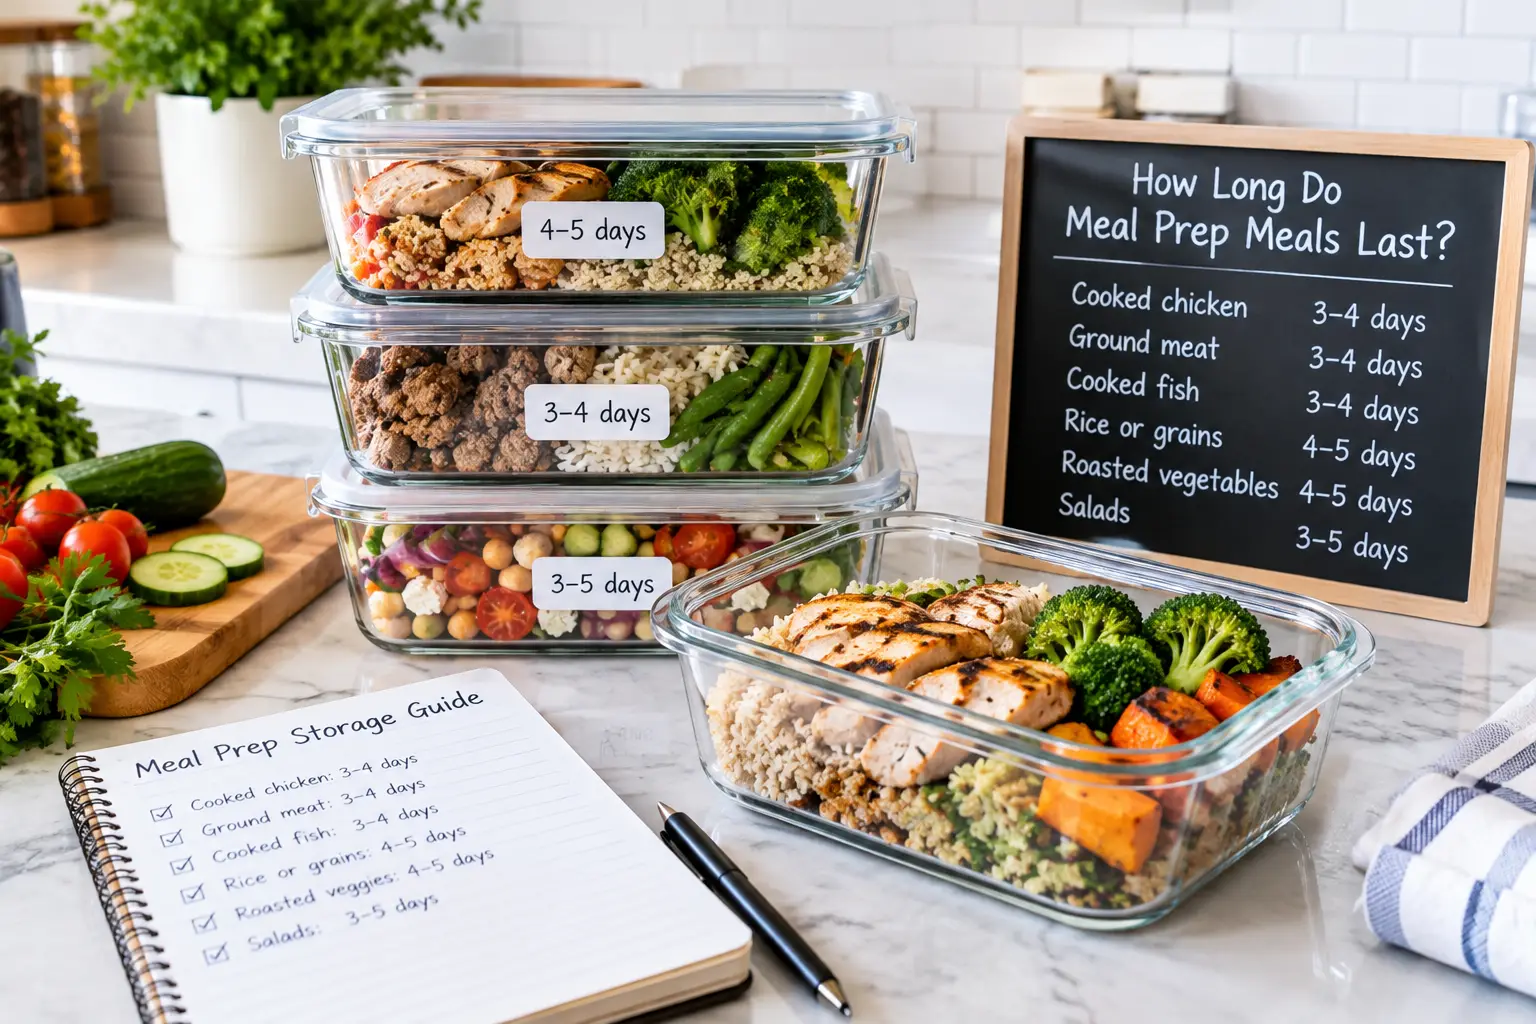
That moment is exactly why so many people search how long do meal prep meals last. Here’s the short version: most cooked meal prep meals last 3 to 4 days in the refrigerator at 40°F or below, and they keep safely much longer in the freezer. That’s not a vibe or a TikTok rule of thumb — it’s the guidance in the USDA’s Leftovers and Food Safety guide, which also says to get leftovers into the fridge within two hours of cooking and to reheat them to 165°F.
But the real answer to how long do meal prep meals last depends on more than the calendar. Your ingredients, how fast you cool the food, your fridge temperature, and — yes — your containers all change the math. A loose-lidded takeout tub and an airtight glass container won’t give you the same Thursday lunch.
In this guide, you’ll get:
- ✅ Clear fridge and freezer timelines by food type
- ✅ A step-by-step routine to prep meals that actually make it to Friday
- ✅ Honest analysis of 7 real storage products available on amazon.com, from budget plastic to a vacuum sealer
- ✅ Fixes for soggy rice, freezer burn, and other common meal prep headaches
Everything here is based on federal food-safety guidance, published spec sheets, and aggregated customer review themes — no invented tests, no made-up testimonials.
Heads-up: this article contains affiliate links. As an Amazon Associate, we earn from qualifying purchases, at no extra cost to you.
Quick Comparison: 7 Storage Picks That Help Meal Prep Last Longer
| Product | Type | Material | Freezer-Safe | Approx. Price Range | Best for |
|---|---|---|---|---|---|
| Prep Naturals Glass Meal Prep Containers | 2-compartment containers (5-pack) | Borosilicate glass, latching lids | Yes | $25–$40 | Prep Naturals: best all-around glass pick |
| Pyrex Simply Store 18-Piece Set | Mixed-size storage set | Tempered glass, plastic lids | Yes | $30–$50 | Pyrex Simply Store: families and batch sides |
| Rubbermaid Brilliance | Leak-proof containers | Tritan plastic, 2-latch lids | Yes | $20–$40 | Rubbermaid Brilliance: soups, sauces, commuting |
| Bentgo Prep 3-Compartment Containers | Divided meal prep boxes | BPA-free plastic | Yes | $15–$30 | Bentgo Prep: portion control on a budget |
| Freshware Meal Prep Containers | Single-compartment boxes (bulk) | Lightweight BPA-free plastic | Yes | $12–$25 | Freshware: high-volume, low-cost prep |
| Souper Cubes 1-Cup Freezing Tray | Portioning freezer tray | Food-grade silicone, steel-rimmed | Yes (not microwave) | $20–$40 | Souper Cubes: freezing soups and stews |
| FoodSaver V4400 2-in-1 Vacuum Sealer | Vacuum sealing system | Countertop + handheld sealer | Bags yes | $130–$200 | FoodSaver V4400: long-term freezer storage |
Prices are approximate ranges at the time of writing and change frequently — check the current price on Amazon.
Looking at the table, the split is really about where your meals will live. If they’re eaten within four days, the Prep Naturals Glass Meal Prep Containers or Rubbermaid Brilliance give you airtight seals that slow drying and odor transfer. If you’re cooking for weeks ahead, the Souper Cubes 1-Cup Freezing Tray and FoodSaver V4400 2-in-1 Vacuum Sealer matter more, because freezer quality — not fridge time — becomes the limiting factor.
💬 One click helps other shoppers make an informed choice too! 😊
Top 7 Meal Prep Containers and Storage Tools: Expert Analysis
No container can turn a 4-day meal into a 10-day meal — food safety timelines are set by bacteria, not branding. What good storage can do is protect quality inside that window: less drying, less odor swapping, faster cooling, and fewer freezer-burned regrets. Here’s how seven real options stack up.
1. Prep Naturals Glass Meal Prep Containers — best all-around glass workhorse
If you want one container that handles fridge, freezer, microwave, and oven, this 2-compartment, 5-pack set is the most balanced pick in the lineup.
The borosilicate glass is the key spec. Borosilicate tolerates temperature swings better than ordinary glass, so moving a meal from fridge to oven (lid off) is less nerve-racking. Glass also doesn’t absorb tomato stains or curry smells, which means Week 10 tastes like Week 1. The divider keeps sauces from soaking into rice — a small detail that buys you an extra day of pleasant texture, even if not an extra day of safety.
Based on comparing the specs, this is the right fit for people who reheat at home or at an office with a microwave and don’t mind carrying a little extra weight. It’s less ideal for kids’ lunches or gym bags, where glass weight and breakage risk add up.
Aggregated retailer reviews consistently praise the sturdy glass and easy cleanup, while a recurring complaint is that some lids don’t latch or seal as tightly as others.
Pros:
- ✅ Borosilicate glass handles fridge-to-oven transitions well
- ✅ Won’t stain or hold onto food odors
- ✅ Divider keeps wet and dry foods apart
Cons:
- ❌ Heavier than any plastic option here
- ❌ Lid seal quality varies, per review feedback
Expect roughly $25 to $40 for a 5-pack — strong value if you’ll use them for years.
2. Pyrex Simply Store 18-Piece Set — most versatile sizes for families
This set wins on variety: nine glass containers in mixed sizes let you store mains, sides, and sauces separately instead of locking everything into one-size meal boxes.
The tempered glass bases are oven-, microwave-, fridge-, and freezer-friendly, while the plastic lids are for storage only — they shouldn’t go in the oven. In practice, that means you can bake a casserole, cool it, portion it, and store it in the same dish. Separate components also keep longer in good shape: rice stays drier when it isn’t sitting under a sauce for three days.
What most buyers overlook is that Pyrex warns against sudden temperature changes, so a frozen dish shouldn’t go straight into a hot oven. If your household eats “build-your-own” bowls, this set fits better than compartment boxes.
Review sentiment is broadly positive about glass durability; the most common complaints focus on the lids, which some owners report cracking or losing their snug fit over time.
Pros:
- ✅ Wide size range for mains and sides
- ✅ Bases go from oven to table
- ✅ Widely available, recognizable brand
Cons:
- ❌ Lids aren’t leak-proof for soups
- ❌ Glass needs gentle temperature transitions
Typically in the $30 to $50 range — very fair for the flexibility.
3. Rubbermaid Brilliance — the leak-proof commuter’s pick
If your meal prep includes soups, chili, or saucy curries that ride in a bag, the Brilliance line is the safest bet against a messy backpack.
The lids use two latches and a gasket, and Rubbermaid advertises the containers as 100% leak-proof and airtight. Practically, an airtight seal slows moisture loss and keeps fridge odors out, so day-four leftovers taste closer to day one. The Tritan plastic is clear, shatter-resistant, and stain-resistant, and built-in vents let you microwave with the lid on, cutting splatter.
On paper, this is the best plastic choice for anyone who transports food daily. It’s lighter than glass, safer for kids to handle, and stacks neatly. However, it isn’t oven-safe, so casserole cooks should pair it with glass.
Across retailer reviews, owners consistently report that the seals hold up and the containers stay clear; complaints are scattered and mostly about price per container.
Pros:
- ✅ Genuinely leak-resistant latching lids
- ✅ Stain- and odor-resistant Tritan plastic
- ✅ Vented lids for cleaner microwaving
Cons:
- ❌ Not oven-safe like glass
- ❌ Pricier per piece than basic plastic
Usually $20 to $40 depending on set size — worth it if leaks have ruined a bag before.
4. Bentgo Prep 3-Compartment Containers — easiest portion control
Three compartments make this the simplest tool for anyone tracking macros or trying to eat more vegetables without thinking too hard about it.
The BPA-free plastic boxes are microwave-, dishwasher-, and freezer-safe, and the three sections nudge you into a protein-carb-veg layout. That structure matters for freshness too: keeping roasted vegetables away from a wet main helps them stay crisp longer. The containers stack well, which helps if fridge space is tight.
Here’s what to weigh: the compartments don’t seal individually under the lid, so a runny sauce can migrate. That makes these better for “dry” meals — grilled chicken, rice, broccoli — than for stews. For beginners, though, the visual portioning is genuinely helpful.
Review themes generally praise the value and portioning layout; a common caveat is that lids aren’t designed to be leak-proof for liquid-heavy dishes.
Pros:
- ✅ Built-in portion control with three sections
- ✅ Freezer-, microwave-, and dishwasher-safe
- ✅ Lightweight and easy to stack
Cons:
- ❌ Sauces can travel between compartments
- ❌ Not suited for soups or stews
Usually $15 to $30 per multipack — great value for structured weekday lunches.
5. Freshware Meal Prep Containers — best budget bulk option
When you’re feeding a household or doing high-volume prep, Freshware’s bulk packs of single-compartment boxes keep costs low.
These are lightweight, BPA-free, and listed as microwave-, freezer-, and dishwasher-safe. The thin plastic is a trade-off: it cools food quickly (good for safety), but it won’t survive years of hot dishwasher cycles the way Tritan or glass will. Think of them as semi-disposable — ideal for gifting meals, sending food home with family, or rotating through freezer stock.
Based on comparing specs, these make the most sense for people who prep 10+ meals a week or regularly give food away. If you want long-term reuse, the per-year cost of replacing them can eventually overtake a sturdier set.
Aggregated reviews highlight the price and convenience, while a recurring complaint is warping after repeated microwaving or dishwasher runs.
Pros:
- ✅ Very low cost per container
- ✅ Light and quick to cool
- ✅ Great for sharing or gifting meals
Cons:
- ❌ Can warp with repeated heat
- ❌ Lids lose snugness over time
Typically $12 to $25 for a bulk pack — unbeatable for quantity, weaker for longevity.
6. Souper Cubes 1-Cup Freezing Tray — smartest way to freeze soups
This tray turns a pot of soup into frozen, perfectly measured one-cup blocks — the cleanest solution for freezer-based meal prep.
Made from food-grade silicone with a steel-reinforced rim, the tray has fill lines for half-cup and one-cup portions plus a lid that limits freezer odor. The workflow is the point: freeze, pop out the blocks, store them in a bag, and reuse the tray. Smaller portions thaw faster in the fridge, and you only reheat what you’ll eat.
What the spec sheet doesn’t stress: the tray is not microwave-safe, so you’ll reheat in a pot or a microwave-safe dish. It’s a freezer tool, not a lunchbox.
Review sentiment is strongly positive about portioning and easy release; the main caveat owners mention is that the trays take up freezer space if you leave food in them rather than transferring the blocks.
Pros:
- ✅ Precise one-cup and half-cup portions
- ✅ Steel rim keeps the tray stable
- ✅ Frozen blocks pop out easily
Cons:
- ❌ Not microwave-safe
- ❌ Bulky if used for long-term storage
Around $20 to $40 depending on pack size — excellent value for soup and sauce lovers.
7. FoodSaver V4400 2-in-1 Vacuum Sealer — best for months-long freezer storage
If you prep a month at a time, removing air is the single biggest upgrade for freezer quality — and that’s this machine’s job.
The V4400 combines a countertop sealer with automatic bag detection and a retractable handheld sealer for zipper bags and canisters. Practically, vacuum sealing reduces the air contact that causes freezer burn, so a frozen chili or marinated chicken tastes closer to fresh after a couple of months. It also makes flat, stackable packs that freeze and thaw faster.
The honest caveat: vacuum sealing does not extend fridge safety for cooked food beyond the 3–4 day guidance. Its value is almost entirely in the freezer. Budget for bags, too — they’re an ongoing cost.
Across review roundups, the automatic bag detection and handheld attachment are the most praised features, while ongoing bag costs and occasional sealing trouble with very moist foods come up repeatedly.
Pros:
- ✅ Dramatically reduces freezer burn
- ✅ Automatic bag detection simplifies sealing
- ✅ Handheld sealer works with canisters
Cons:
- ❌ Bags add recurring cost
- ❌ Takes up counter or cabinet space
Often $130 to $200 — a smart investment only if you freeze in volume.
✨ Build a Meal Prep Setup That Actually Lasts!
🔍 Take your meal prep to the next level with this carefully curated lineup. Click a highlighted item to check current pricing and availability. These picks will help you get fresher, safer lunches all week long!
How Long Do Meal Prep Meals Last in the Fridge? The Food-by-Food Answer
What is the safe fridge life of meal prep?
Most cooked meal prep meals last 3 to 4 days in a refrigerator held at 40°F (4°C) or below. That window starts when the food is cooked, not when you portion it. Freezing at 0°F keeps food safe indefinitely, but quality fades, so most frozen meal prep is best eaten within 2 to 3 months.
So, how long does meal prep last in the fridge when you break it down by ingredient? The federal Cold Food Storage Charts on FoodSafety.gov give the clearest reference. Here’s how the most common meal prep components line up:
| Meal prep component | Fridge (40°F or below) | Freezer quality window (0°F) | Best for |
|---|---|---|---|
| Cooked chicken, beef, pork, turkey | 3–4 days | 2–6 months | Classic protein bowls |
| Soups, stews, chili | 3–4 days | 2–3 months | Freezer-first prep |
| Cooked rice, pasta, grains | 3–4 days (rice: eat sooner) | 1–2 months | Base layers |
| Egg, chicken, tuna, pasta salads | 3–4 days | Does not freeze well | Early-week lunches |
| Cooked fish and seafood | 3–4 days | 4–6 months | First two days |
| Hard-boiled eggs | About 1 week | Do not freeze | Snack boxes |
The table shows why a five-day prep plan needs a strategy rather than a single cook-off. Almost every cooked component tops out at four days, so Friday’s lunch should either come from the freezer or be cooked midweek. Mayo-based salads are the trap: they’re safe for four days in the fridge but can’t be frozen, so they belong at the front of your week.
A few nuances the charts don’t spell out:
- ⚡ Rice is the riskiest base. Cooked rice can carry Bacillus cereus spores, which survive cooking. Cooling rice quickly in shallow containers matters more for rice than almost any other food.
- 🔋 Seafood loses quality fastest. Even when it’s technically within safe limits, reheated fish turns rubbery and pungent by day three or four. Schedule it for Monday or Tuesday.
- 🥗 Raw greens are about texture, not just safety. Dressed salads wilt within hours; keep dressing separate and greens dry.
One honest caveat: these are maximums, not targets. Food that sat out too long before chilling, or a fridge running warm, shortens every number in that table.
How Long Can You Freeze Meal Prep? Safety vs. Quality
Here’s the part most meal prep guides blur together: freezer safety and freezer quality are two different clocks. At a steady 0°F, bacteria can’t multiply, so properly frozen food stays safe indefinitely. The months you see on storage charts are about taste and texture, not risk.
So how long can you freeze meal prep before it stops being enjoyable? For most cooked dishes, plan on 2 to 3 months for peak quality. Soups, stews, and chili sit comfortably in that range. Cooked meat and poultry dishes can stretch further — up to several months — especially when vacuum sealed.
Why frozen meals decline
The enemy is air. When frozen food is exposed to dry freezer air, moisture sublimates from the surface and leaves pale, leathery patches — freezer burn. It’s safe to eat, but it tastes like cardboard. That’s why the packaging you choose shapes your real-world freezer life:
- ✅ Vacuum-sealed bags (like those from the FoodSaver V4400 2-in-1 Vacuum Sealer) remove most of the air and give the longest quality window.
- ✅ Silicone portion blocks from the Souper Cubes 1-Cup Freezing Tray, transferred to a well-pressed freezer bag, are a close second for liquids.
- ✅ Airtight rigid containers such as Rubbermaid Brilliance or Prep Naturals Glass Meal Prep Containers work well when filled close to the top, leaving about half an inch for expansion.
- ❌ Half-empty containers and loosely wrapped plates trap air and burn fastest.
Foods that don’t freeze well
Not every meal prep component survives the freezer. Mayo-based salads separate, raw greens turn to slime, and cream sauces can split. Cooked potatoes often turn grainy, and crispy coatings go soft. Plan these as fresh, early-week meals instead.
The labeling habit that saves meals
Write the dish name and the freeze date on every container or bag. It sounds fussy, but it’s the difference between confidently eating a two-month-old chili and tossing a mystery block in month six. A simple first-in, first-out rotation — new meals in the back, older ones up front — keeps your freezer from becoming a food archive.
How to Store Meal Prep So Every Meal Lasts the Full Week
Knowing how long do meal prep meals last is only half the job; the other half is a routine that protects that window. Here’s a practical, start-to-finish workflow.
Step 1: Split your week into “fridge meals” and “freezer meals”
Cook once, but store twice. Meals for Monday through Wednesday go in the fridge; Thursday and Friday meals go straight into the freezer. Move Thursday’s meal to the fridge Wednesday night to thaw. This single habit solves the five-day problem without breaking USDA guidance.
Step 2: Cool fast, then cover
The two-hour rule starts the moment food leaves the heat. Divide big batches into shallow containers — roughly two inches deep or less — so the center chills quickly. Hot food can go into the fridge; you don’t need to wait until it’s room temperature. Leave lids slightly ajar for the first 20–30 minutes, then seal them to trap moisture and block fridge odors.
Step 3: Store components separately when you can
Sauces, dressings, and crunchy toppings should ride in their own compartments or small containers. The divided Prep Naturals Glass Meal Prep Containers and Bentgo Prep 3-Compartment Containers make this nearly automatic.
Step 4: Label everything
A strip of masking tape with the dish and date takes five seconds. It ends the Thursday guessing game for good.
Step 5: Reheat properly
Reheat until the food reaches 165°F all the way through, checked with a food thermometer. Cover the dish and stir halfway through microwaving to eliminate cold spots — the center of a dense rice bowl is usually the last place to heat.
Common mistakes in your first 30 days
- ❌ Cooking seven days of meals and refrigerating all of them
- ❌ Stacking hot containers tightly, which slows cooling
- ❌ Trusting the smell test (many illness-causing bacteria don’t change smell or taste)
- ❌ Refreezing thawed raw ingredients carelessly
- ❌ Ignoring your fridge temperature
Real-World Scenarios: Matching Your Routine to the Right Setup
Generic advice only goes so far. Here are three common meal prep profiles, with the setup that fits each one and why.
🏢 The office commuter: 5 lunches, $40 budget
You take the train, eat at your desk, and have access to a shared microwave. Your biggest risks are leaks in your bag and Friday’s lunch going past the four-day mark.
Best fit: Rubbermaid Brilliance for saucy lunches, plus a few Souper Cubes 1-Cup Freezing Tray portions of soup or chili for Thursday and Friday. Cook Sunday, refrigerate three lunches, and freeze two. The latching lids survive a crowded commute, and the vented lids make office microwaving less messy. Total spend lands near your budget, and you never eat day-five chicken.
🏋️ The fitness tracker: 10–14 meals a week, tight macros
You eat two prepped meals a day and weigh portions. Volume is high, so cost per container matters, and the meals are mostly “dry” — grilled protein, rice, and vegetables.
Best fit: Bentgo Prep 3-Compartment Containers for portion structure, backed by a bulk pack of Freshware Meal Prep Containers for freezer overflow. Prep twice a week — Sunday and Wednesday — instead of once. That keeps every meal comfortably inside the 3–4 day fridge window without relying on the freezer for half your food.
👨👩👧 The family batch cook: one big session a month
You cook large batches of soups, casseroles, and marinated proteins on one weekend and pull dinners all month. Freezer quality is everything for you.
Best fit: FoodSaver V4400 2-in-1 Vacuum Sealer for proteins and casseroles, Souper Cubes 1-Cup Freezing Tray for soups, and the Pyrex Simply Store 18-Piece Set for reheating and serving. Vacuum-sealed packs freeze flat and stack like files, which makes the monthly rotation easy to see. The higher upfront cost pays back if it prevents even a few freezer-burned dinners from hitting the trash.
Problem → Solution: Fixing the Most Common Meal Prep Headaches
Even a well-planned prep week runs into trouble. Here are five frequent problems and the fixes that actually work.
Problem 1: “My rice is dry and hard by Wednesday.”
Solution: Rice loses moisture to the fridge’s dry air. Store it in an airtight container and sprinkle a teaspoon of water over it before reheating, covered. A sealed lid like those on Rubbermaid Brilliance containers slows this drying noticeably compared with loose takeout lids.
Problem 2: “Everything tastes like garlic and onions.”
Solution: Odor transfer usually means a lid isn’t airtight or the plastic has absorbed smells. Glass bases from the Prep Naturals Glass Meal Prep Containers or the Pyrex Simply Store 18-Piece Set don’t hold odors. For plastic, wash promptly and air out containers before stacking them.
Problem 3: “My frozen meals have ice crystals and gray patches.”
Solution: That’s freezer burn from trapped air. Fill containers closer to the top, press air out of bags, or vacuum seal with the FoodSaver V4400 2-in-1 Vacuum Sealer. Also check that your freezer holds 0°F; frequent temperature swings worsen crystal growth.
Problem 4: “My vegetables turn soggy.”
Solution: Undercook vegetables slightly during prep — they finish cooking during reheating. Keep them in a separate compartment away from sauces, which is where the Bentgo Prep 3-Compartment Containers layout earns its keep.
Problem 5: “I never know if Thursday’s lunch is still safe.”
Solution: Stop guessing. Label every container with the cook date, and move Thursday and Friday meals to the freezer on prep day. When in doubt, follow the USDA’s simple rule: if you can’t confirm it’s within four days, throw it out. A wasted $4 lunch beats a sick day.
How to Choose Meal Prep Containers That Keep Food Fresh
The right meal prep containers won’t extend the 3–4 day safety window, but they decide whether day four tastes good or sad. Use these seven criteria:
- Prioritize an airtight seal. Air dries food and carries odors. Latching gasket lids beat press-on lids every time for fridge quality.
- Match material to how you reheat. Reheating in an oven or toaster oven? You need glass bases. Microwave only? Quality plastic like Tritan is fine and lighter.
- Choose shallow over deep. Shallow containers cool food faster, which is the single most important safety habit after the two-hour rule.
- Decide on compartments. Divided containers keep sauces away from grains and vegetables, preserving texture. Single-compartment boxes are better for soups, stews, and casseroles.
- Check freezer suitability. Look for “freezer-safe” in the specs and leave headspace for liquids. Glass must be cooled before freezing and thawed gently.
- Think about transport. If meals ride in a bag, leak resistance and weight matter more than oven compatibility.
- Calculate cost per year, not per pack. A cheap pack replaced every few months can cost more over time than a durable set used for years.
Quick decision framework
- If you commute with soups or sauces, choose a latching leak-proof lid, because press-on lids eventually fail in a bag.
- If you reheat in the oven, choose glass, because plastic can’t handle direct oven heat.
- If you prep 10+ meals a week on a budget, choose bulk lightweight plastic, because replacement cost stays low.
- If you freeze for a month or more, choose vacuum sealing or silicone portion trays, because air exposure drives freezer burn.
None of these criteria require the most expensive option. Most households land on a mix: a few glass containers for home reheating and a few leak-proof plastic ones for travel.
Glass vs. Plastic vs. Silicone vs. Vacuum Bags: Which Keeps Meals Best?
Every storage material involves trade-offs. Here’s how they compare against the old-school default — reused takeout tubs and plastic wrap.
| Storage method | Fridge quality | Freezer quality | Reheating | Durability | Best for |
|---|---|---|---|---|---|
| Glass with latching lid | Excellent (no odor absorption) | Good with headspace | Oven + microwave (lid off) | Years | Prep Naturals Glass Meal Prep Containers, Pyrex Simply Store 18-Piece Set |
| Tritan / premium plastic | Excellent with gasket lids | Good | Microwave only | Years | Rubbermaid Brilliance |
| Basic BPA-free plastic | Good | Fair | Microwave only | Months | Bentgo Prep 3-Compartment Containers, Freshware Meal Prep Containers |
| Silicone portion trays | N/A (freezer tool) | Very good | Transfer first | Years | Souper Cubes 1-Cup Freezing Tray |
| Vacuum-sealed bags | Good | Best | Transfer or simmer-safe bags | Single-use bags | FoodSaver V4400 2-in-1 Vacuum Sealer |
| Takeout tubs / plastic wrap | Fair to poor | Poor (air gaps) | Varies, often unclear | Weeks | Short-term emergencies only |
The pattern is clear: the tighter the seal, the better the food holds up — and takeout tubs lose on almost every row. Glass wins at home because it reheats in any appliance and never smells like last week’s curry, while premium plastic wins on the go. For freezer life, vacuum sealing leads, with silicone portioning a close and cheaper runner-up.
Is plastic safe for reheating?
All of the plastic picks above are marketed as BPA-free and microwave-safe. Still, a conservative habit many people adopt is to reheat in glass or ceramic when convenient and avoid microwaving plastic that’s scratched, cloudy, or warped. That’s a reasonable precaution rather than an emergency — but it’s another reason a few glass containers belong in any meal prep kit.
Common Mistakes to Avoid When Buying Meal Prep Containers
A lot of meal prep frustration starts at checkout. These are the pitfalls that show up again and again in customer review patterns.
Mistake 1: Buying one size for everything
A 28-ounce box is great for a rice bowl and terrible for a half-cup of dressing. Mixed sizes — the main strength of the Pyrex Simply Store 18-Piece Set — let you store components separately, which keeps textures right through day four.
Mistake 2: Assuming “airtight” means “leak-proof”
These aren’t the same claim. Many containers keep air out well enough for the fridge but will still seep soup sideways in a tote bag. If you transport liquids, look specifically for latching, gasketed lids like those on Rubbermaid Brilliance.
Mistake 3: Ignoring lid limits
Glass bases are often oven-safe while their plastic lids are not. Reviews of glass sets regularly mention lids that cracked after a hot dishwasher cycle or a lid-on reheat. Read the care instructions once and save yourself a replacement order.
Mistake 4: Overbuying cheap plastic
Bulk packs feel like a bargain, but thin plastic can warp under repeated heat. If you plan to reuse containers for years, a smaller durable set often costs less over time than repeated bulk purchases.
Mistake 5: Buying a vacuum sealer for fridge meals
A vacuum sealer is a freezer tool. It won’t make cooked chicken safe for a week in the fridge, so it only pays off if you freeze meals regularly.
Mistake 6: Forgetting about your fridge
The best container in the world can’t fix a fridge running at 45°F. An inexpensive appliance thermometer is the most underrated meal prep accessory you can buy.
Safety, Regulations, and Standards Every Meal Prepper Should Know
Understanding the rules behind the numbers makes it easier to answer how long do meal prep meals last for any recipe, not just the ones on a chart.
The temperature rules
Federal food-safety guidance centers on a few key temperatures:
- 🌡️ 40°F (4°C) or below: the target for your refrigerator.
- 🔥 40°F to 140°F: the so-called temperature danger zone, where bacteria multiply fastest.
- ❄️ 0°F (−18°C): the freezer target, where bacterial growth stops.
- ♨️ 165°F (74°C): the internal temperature for reheating leftovers.
Food shouldn’t sit in the danger zone for more than two hours — or one hour if the air is above 90°F, such as a hot car or a summer picnic. That’s why a lunch left in a warm backpack all morning is a bigger risk than one kept in an insulated bag with an ice pack.
Why the smell test fails
Spoilage bacteria make food smell and look bad. Pathogenic bacteria — the ones that cause foodborne illness — often don’t. A meal can look and smell perfect on day six and still be unsafe. That’s the main reason USDA guidance is calendar-based rather than sniff-based.
What “food-safe” labels mean for containers
In the US, materials that touch food are regulated by the FDA as food contact substances. When a product says “food-grade silicone” or “BPA-free,” it’s describing material choices, but it doesn’t change storage times for the food inside. Container labels like “microwave-safe” or “freezer-safe” are manufacturer use instructions, so follow them closely — especially lid instructions.
Special caution for higher-risk eaters
Pregnant people, older adults, young children, and anyone with a weakened immune system face higher risks from foodborne illness. For these households, it’s sensible to aim for the earlier end of the 3–4 day range and to freeze more meals rather than fewer.
Long-Term Cost and Maintenance: What Your Setup Really Costs
Meal prep is often a money-saving project, so it’s worth looking at storage through a cost-of-ownership lens rather than a sticker-price lens.
| Setup | Upfront range | Ongoing costs | Typical lifespan | Best for |
|---|---|---|---|---|
| Bulk plastic | $12–$25 | Replacement every few months to a year | Short | Freshware Meal Prep Containers |
| Divided plastic | $15–$30 | Occasional replacement | 1–2 years with care | Bentgo Prep 3-Compartment Containers |
| Premium plastic | $20–$40 | Gaskets may wear eventually | Several years | Rubbermaid Brilliance |
| Glass sets | $25–$50 | Replacement lids now and then | Many years | Prep Naturals Glass Meal Prep Containers, Pyrex Simply Store 18-Piece Set |
| Freezer tools | $20–$200 | Vacuum bags (sealer only) | Years | Souper Cubes 1-Cup Freezing Tray, FoodSaver V4400 2-in-1 Vacuum Sealer |
The cheapest upfront option isn’t automatically the cheapest over three years. Bulk plastic stays economical only if you’re comfortable treating it as semi-disposable, while glass and premium plastic spread their cost over years of use. The vacuum sealer is the one item whose value depends entirely on how often you freeze — weekly users recoup it through less waste, occasional users may not.
Maintenance that extends container life
- ✅ Wash lids by hand when possible. High dishwasher heat is the most common cause of warped lids and tired gaskets.
- ✅ Pull out and clean gaskets monthly. Food residue trapped behind seals can cause odors.
- ✅ Avoid thermal shock with glass. Let hot glass cool before freezing, and thaw frozen glass in the fridge before reheating.
- ✅ Retire scratched or warped plastic. It seals poorly and is harder to clean thoroughly.
The hidden saving: less wasted food
The real return on good storage is food you don’t throw away. If better seals and smarter freezing save even one or two meals a week from the trash, a mid-range container set typically pays for itself within a couple of months.
FAQ: Quick Answers About Meal Prep Shelf Life
❓ Can you meal prep for 5 days safely?
❓ How long do meal prep meals last in an insulated lunch bag?
❓ Are glass meal prep containers worth the extra cost?
❓ Can you eat meal prep after 5 days if it smells fine?
❓ Is a vacuum sealer worth it for weekly meal prep?
Conclusion: Make Thursday’s Lunch a Sure Thing
So, how long do meal prep meals last? In the fridge, plan on 3 to 4 days at 40°F or below. In the freezer, they stay safe indefinitely at 0°F, with the best flavor and texture typically inside two to three months. Everything else — cooling fast, sealing tight, labeling dates, and reheating to 165°F — is about protecting that window rather than stretching it.
The practical takeaway is simple: cook once, store twice. Keep the first half of the week in the fridge and send the rest straight to the freezer. From there, choose gear that fits your routine. Glass like the Prep Naturals Glass Meal Prep Containers or the Pyrex Simply Store 18-Piece Set suits home reheating. Rubbermaid Brilliance handles commutes, and the Bentgo Prep 3-Compartment Containers or Freshware Meal Prep Containers keep high-volume prep affordable. For freezer-first cooks, the Souper Cubes 1-Cup Freezing Tray and FoodSaver V4400 2-in-1 Vacuum Sealer make month-long planning realistic.
If you ever hit a food you’re unsure about, the USDA’s free FoodKeeper app gives storage times for hundreds of items — a handy pocket reference for prep day.
And when in doubt? Throw it out. No lunch is worth a lost weekend.
🚀 Start Prepping Smarter Today!
🛒 Your future self will thank you on Thursday. Click any highlighted product above to check current pricing and availability, and build a setup that keeps every meal fresh, safe, and genuinely worth looking forward to!
Recommended for You
- Glass Containers with Silicone Lids: 7 Best Leak-Proof Picks (2026)
- Plastic Pint Containers: 7 Durable Options for Food Storage
- 1 gallon food container: 7 Best Airtight Picks (2026 Guide)
Disclaimer: This post contains affiliate links. As an Amazon Associate, I earn from qualifying purchases made through these links, at no additional cost to you.
✨ Found this article helpful? Share it with someone who needs it! 💬🤗